Tuesday 2 September 2014

Sloe Gin


I have been looking for sloes for the past two years. Last year the crop was bad, certainly around here. This year I found a few sad specimens in a hedgerow. Luckily, I was given a gift of these all the way from Wexford. They are not fully ripe as in there is a bit of resistance when I try to squish them so I'm going to leave them in a warm, sunny space with a few bananas knocking about to soften them up. Then pop them into the freezer over night to simulate the first frost. This will help split the skins and allow them to infuse the gin better.


If you are not sure what sloes look like, they remind me of blueberries and are a similar size and a bluey black colour. I have photographed a few here with a one euro coin.

They are the fruit of the Blackthorn bush/small tree (Prunus spinosa). They are usually visible late summer early autumn.The tree is black with spiny thorns.


I made sloe gin a good number of year ago and followed a recipe that said to add an insane amount of sugar to it. Really awful. The best thing is to half fill a bottle with your frozen sloes or if you have picked them after a frost and the skins haven't split prick them in a few places with a sharp knife.

Top up with a good quality gin and add a couple of dessertspoons of caster sugar. Put away somewhere cool until early December and every so often give the bottle a shake.  Decant the gin pouring it through a layer of muslin. Pour back into a clean, sterilised bottle. If you think it's too sharp and want a bit more sweetness, make a sugar syrup with equal quantities of sugar and water heated until the sugar is well dissolved and brought to the boil. Cool and add to taste. 

It's traditional to have sloe gin at Christmas or in a hip flask out hunting. 

Blackthorn in hedgerow


Wednesday 18 June 2014

Elderflower Fizz with Crème de Cassis

2012 vintage
I love this time of year when you can gather up stuff growing in a hedgerow and make booze. It's always interesting and exciting waiting to see if it turns out.

I made elderflower champagne two years ago and I still have some. It's really delicious. Light, sparkling and fantastic on a hot day to mix with other drinks, particularly Crème de Cassis.

The best purchase I ever made though are the correct bottles. (See picture). You can either save these, usually lemonade comes in them or buy in Ikea or from an on line home brew company. They keep the fizz in and prevent souring or moulding.

Recipe
20 elder flower heads
500g sugar
100ml white grape juice
2 lemons
4.6 litres of cooled boiled water
1 x 5g sachet of champagne yeast (optional)


Gather up the elder flowers when in full bloom and in the morning when the sun is shining. If you gather late in day or in dull or wet weather they give off a strong whiff of cat pee.

You need about 20 with as much of the stem/stalk removed as possible. Stalks give a bitter after taste. Use a fork or a sharp scissors to remove the flowers.

Put them in a large cleaned and sterilised bucket with a lid.

Add half the sugar and stir it around the elder flowers. Leave lightly covered with lid for a few hours. This gets the smell and flavour to imprint on the sugar.

Add the cooled boiled water (cooled to body temperature or until you can comfortably hold your finger in it), juice from the lemons and the lemon skins, the remaining sugar and the white grape juice. Give the whole thing a good stir to dissolve the sugar. Lightly cover with lid to prevent dust and moulds falling in and put somewhere cool overnight.

Next day put about a teaspoon of the yeast into the mix and stir well. I find it's better not to add the whole sachet but you can if you wish. It just means it will be more alcoholic.

Leave in the bucket for a week stirring every day. At this point you can either transfer by straining the liquid through a double layer of muslin to a demi-john with a bubble trap and continue fermentation in it. I didn't do this as I hadn't got one two years ago. I just put it into the spring top bottles and every few days opened them cautiously to release some of the carbon dioxide. If you don't do this you may have explosions.

You need to do this religiously every few days for a few weeks or until you get less of a violent reaction and the bubbles do not rise with quite such ferocity to top. At this point you can transfer to a cool dark garage or unheated room to leave it to continue fermenting.

(If you ferment in a demi-john transfer to bottles by straining though muslin again or siphon into bottles when the bubbles in the bubble trap have slowed right down).

Every method or recipe I read said it doesn't keep. I made the one pictured in 2012 and it had no champagne yeast in it. I can tell you it does. And it tastes a lot better now than when I first made it. I think the secret is to have the right bottles and to ensure everything you use is clean and sterilised.

I serve it chilled with some of my homemade crème de cassis. But it's also lovely on it's own.

Tuesday 10 June 2014

Beech Leaf Noyau

I must confess I had never heard of this before but when Dee from Greensideup recently posted a picture of a glorious brown liqueur that she had made last year, I was intrigued. I Googled it straight away.

I just happened to glance out the window and notice that lovely lime green beech leaves were beginning to unfurl. I had to find a recipe fast as you need to use young leaves. The recipes were all very vague but that doesn't bother me.

I just gathered up as many leaves as would fit in this lovely Nicholas Mosse jug. It's just over a litre capacity. I then put just the leaves (remove stems) and covered with gin. Seal it up with some cling film and leave for three weeks. 


I admit I left mine longer than three weeks. More like five.


I strained the liquid off into a clean jug and gathered the leaves up and gave them a good squeeze. The recipe I was following was based on using a full 75cl bottle of gin. I had used up ends of bottles but typically forget to measure what I actually used. I guestimated it was half a bottle so I halved the other ingredients.

Make a sugar syrup. If using full bottle of gin it's 225g sugar in 300ml water. Heat and boil for a few minutes. Cool.

Add 200ml brandy to the gin with the cooled sugar syrup. Pour into a clean, sterilised bottle and store.

It says in the recipe it can be drunk neat or as a mixer. I imagine it needs a bit of storage before using it. I intend to experiment with different mixes.

I will keep you posted.


Friday 18 April 2014

Vin D'Alsace Pinot Blanc 2013

Aldi and Lidl have really upped their wine game. There was a time when they only sold the plonkiest of plonk.

Aldi's Exquisite Collection includes a really good Gigondas for €15 and a Gavi for €8.49. This Pinot Blanc at €10 scores 3.5 on the Vivino app. For the price it's excellent value.

It is ideal for summer barbeques or as an aperitif. It's fruity and citrusy but dry. It needs to be served chilled.

Great value for the price.

Thursday 9 January 2014

The Definitive Sourdough Recipe

You would not believe how many attempts it took
me to finally get to this (or maybe you would).

I persevered mainly, because I kept telling myself that if ancient Egyptians could do it with limited technology or knowledge about what was actually going on - I could.

I have also mastered the art of it taking a limited amount of my time. You do need to plan ahead though. It basically takes two days to get a loaf but about twenty minutes of your time in total.

You need to start with a starter. This may sound a bit obvious, but a good starter takes a bit of work. Once your starter is nice and active, it basically does all the work.

This is how to make your starter here. A French baker gave me a recipe which used peaches. I would imagine any fruit, even apples from an orchard would work.

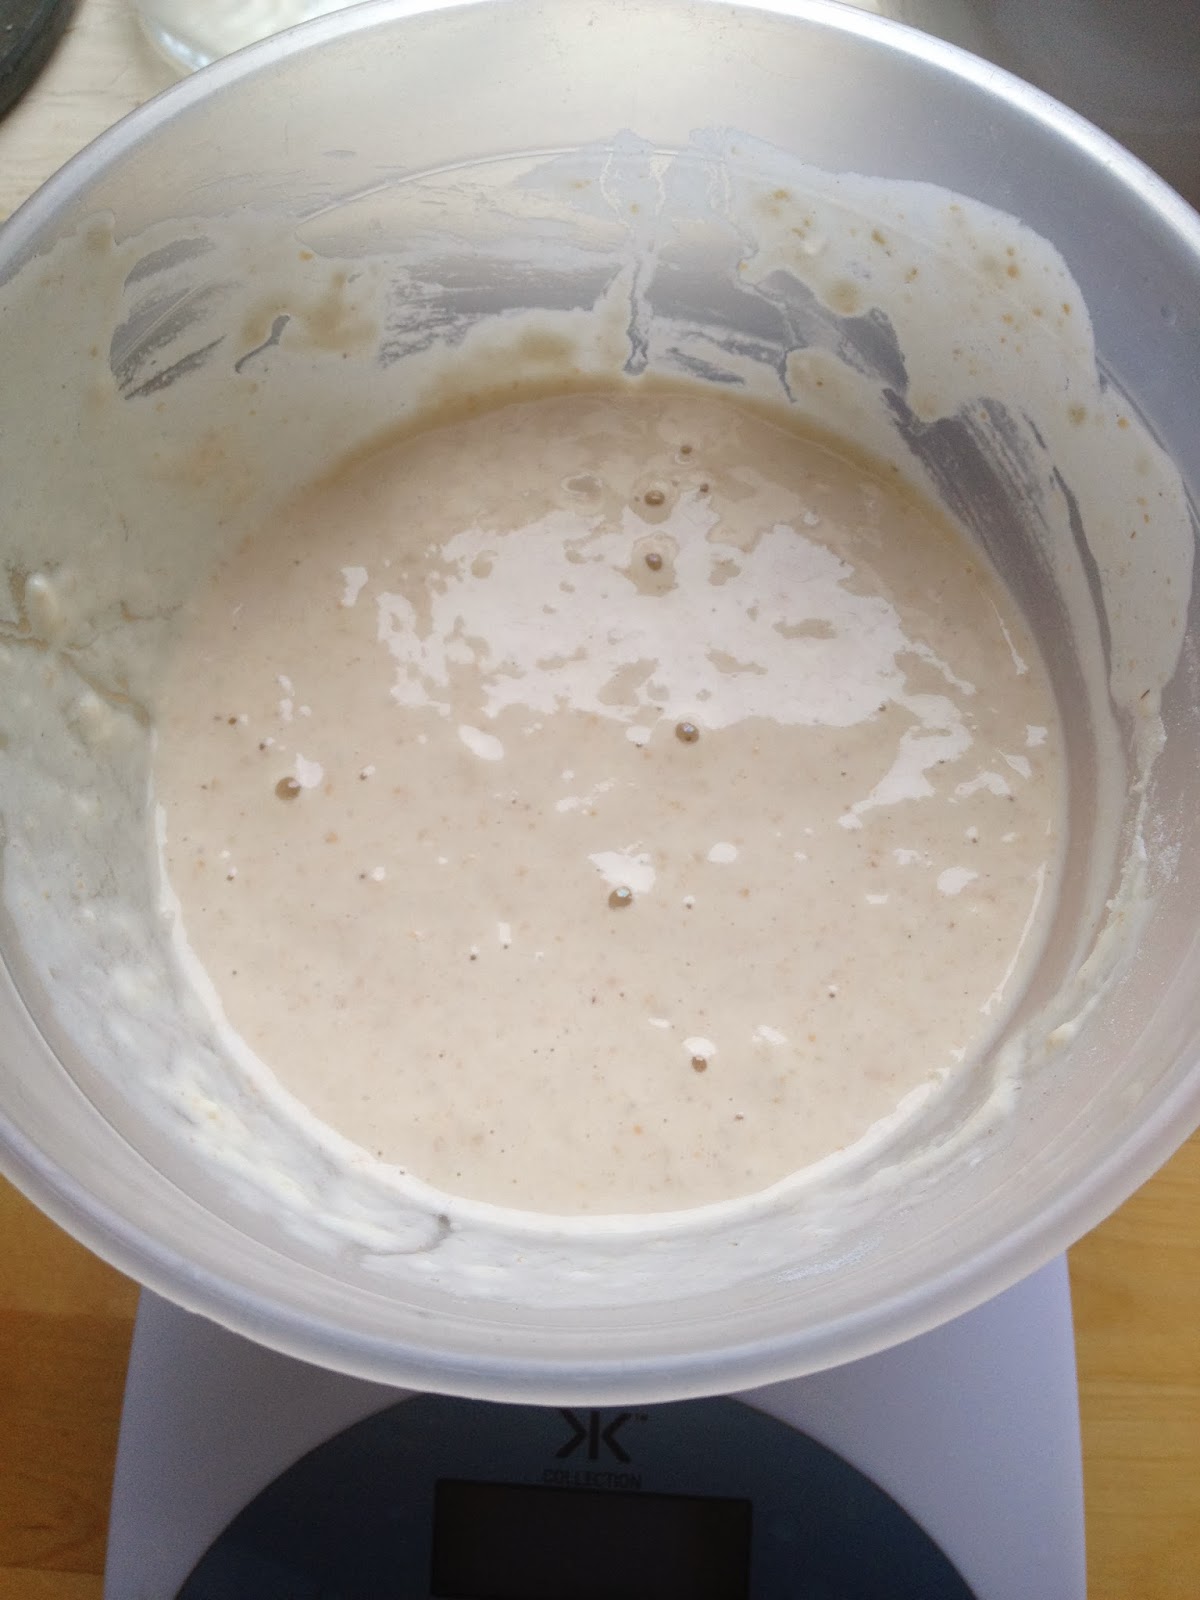
To test your starter pour 150g of it into a bowl and add 100g flour (a half and half rye and wheat flour mix works best). Use organic if possible. Add 150ml water and stir. Leave in a warm place for a few hours (in summer 2-3 but in winter 4-6, unless your kitchen is very warm). You could also leave it overnight. It should start to have bubbles in it and become "holey" in appearance. This is often called the sponge.

Every time you use your starter, you need to replace what you have used or feed it. I add about 50g of flour and 100g of water to it. Store it in the fridge. You need to feed it weekly, ideally, whether you use it or not. Although I have forgotten mine for weeks without any adverse effect. 

I do this in the morning and leave it for most of the day. Then later in the evening I begin the next stage and leave it overnight.

Just starting to bubble
Next step is to pour this sponge into a mixing bowl. Add 350g strong white bread flour (or another 300g white flour and 50g rye). Add 10g salt.  Put 300ml of water in a jug.

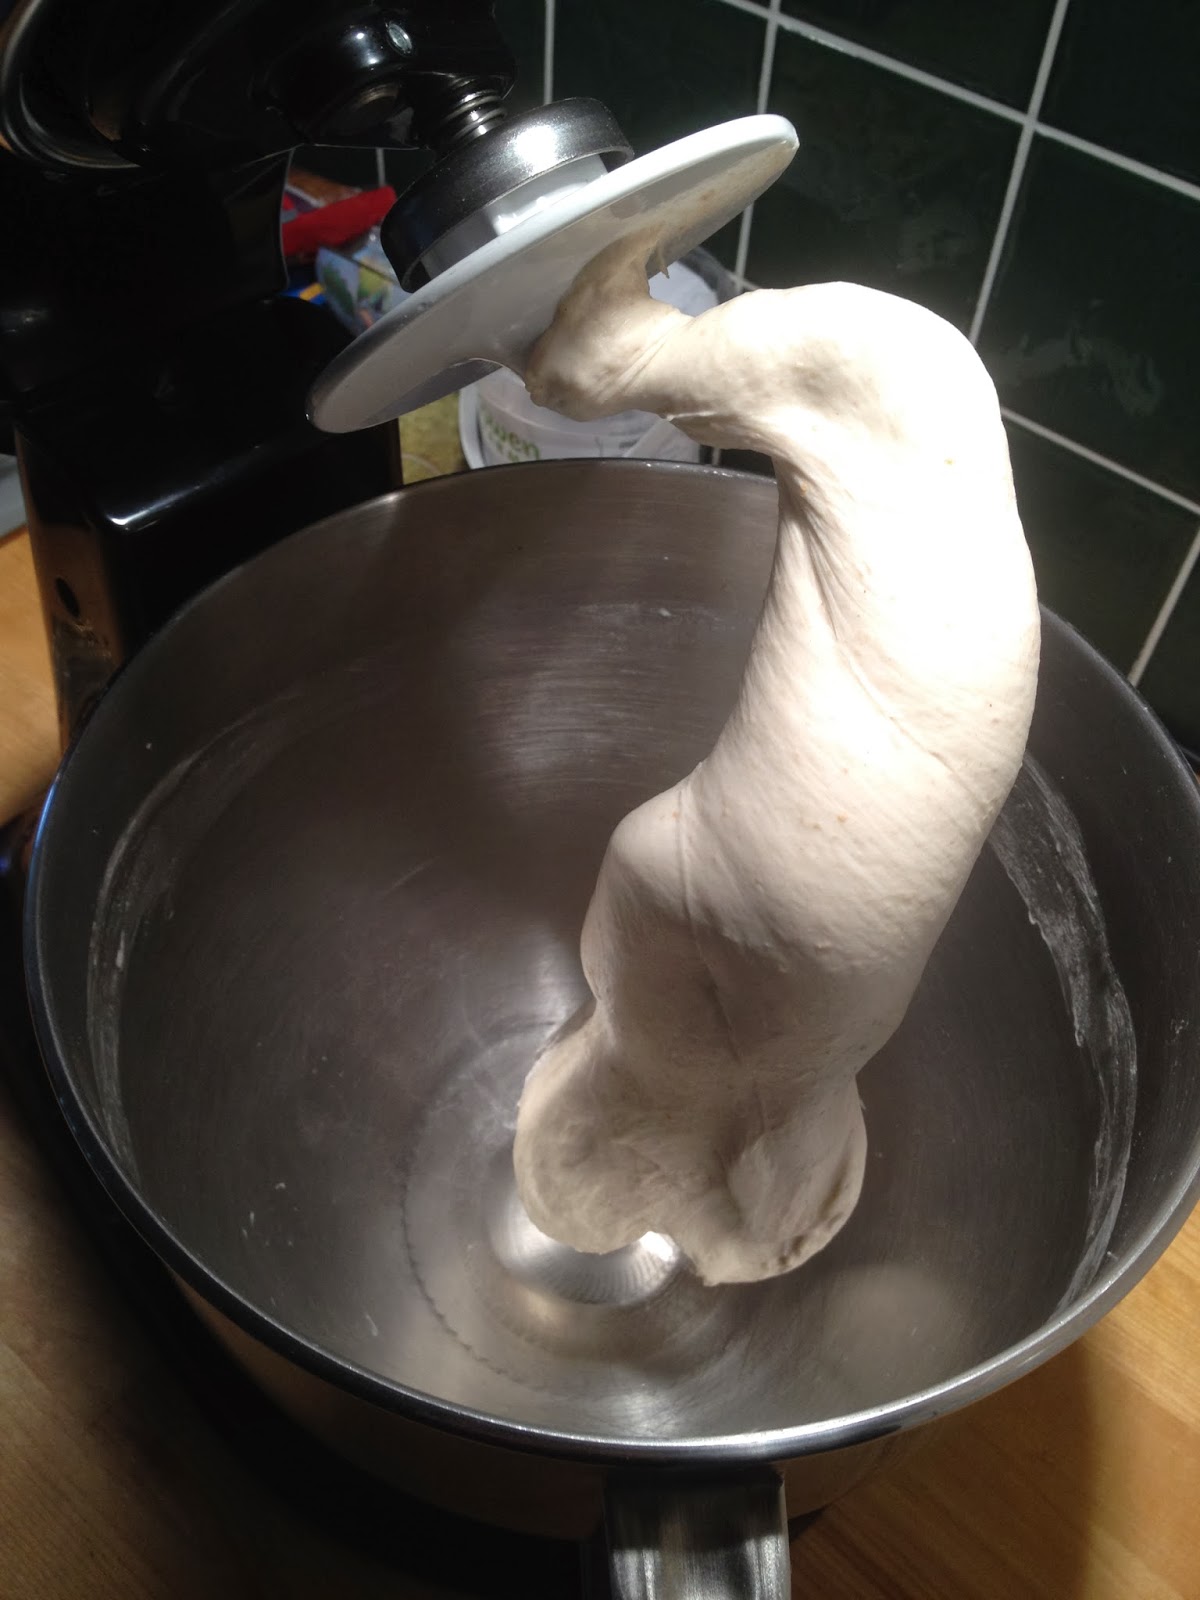
Start your mixer on a low setting using the dough hook. Gradually add the water. Do not add it all at once. All flours absorb different amounts of liquid.  Mix at a low speed for ten minutes.

You need to get the hang of testing firstly if the dough is wet enough. It is preferable to be over-hydrated rather than under as if under, it will give a tough and a dense textured loaf.  If the dough ball has cleaned the sides of the bowl and is just sticking to the base as it mixes you are on the right track. If you pull some of the dough with your fingers and it is quite silky, it is about right.

dough feels stretchy and light
Turn the mixer to a high speed and mix for a few minutes. Alternate high and low speed until dough is kneaded.

How you test it is kneaded enough - is it slapping against the bowl on a high speed? Secondly, when you pull a piece of the dough out could you blow a bubble as in bubble gum without it tearing? If it tears immediately it's not kneaded properly. If it is good and stretchy and doesn't tear it is.

Transfer the dough to a well-floured bowl. Rub some vegetable oil over the surface. This is to stop it forming a crust. Cover with cling film and leave it overnight.

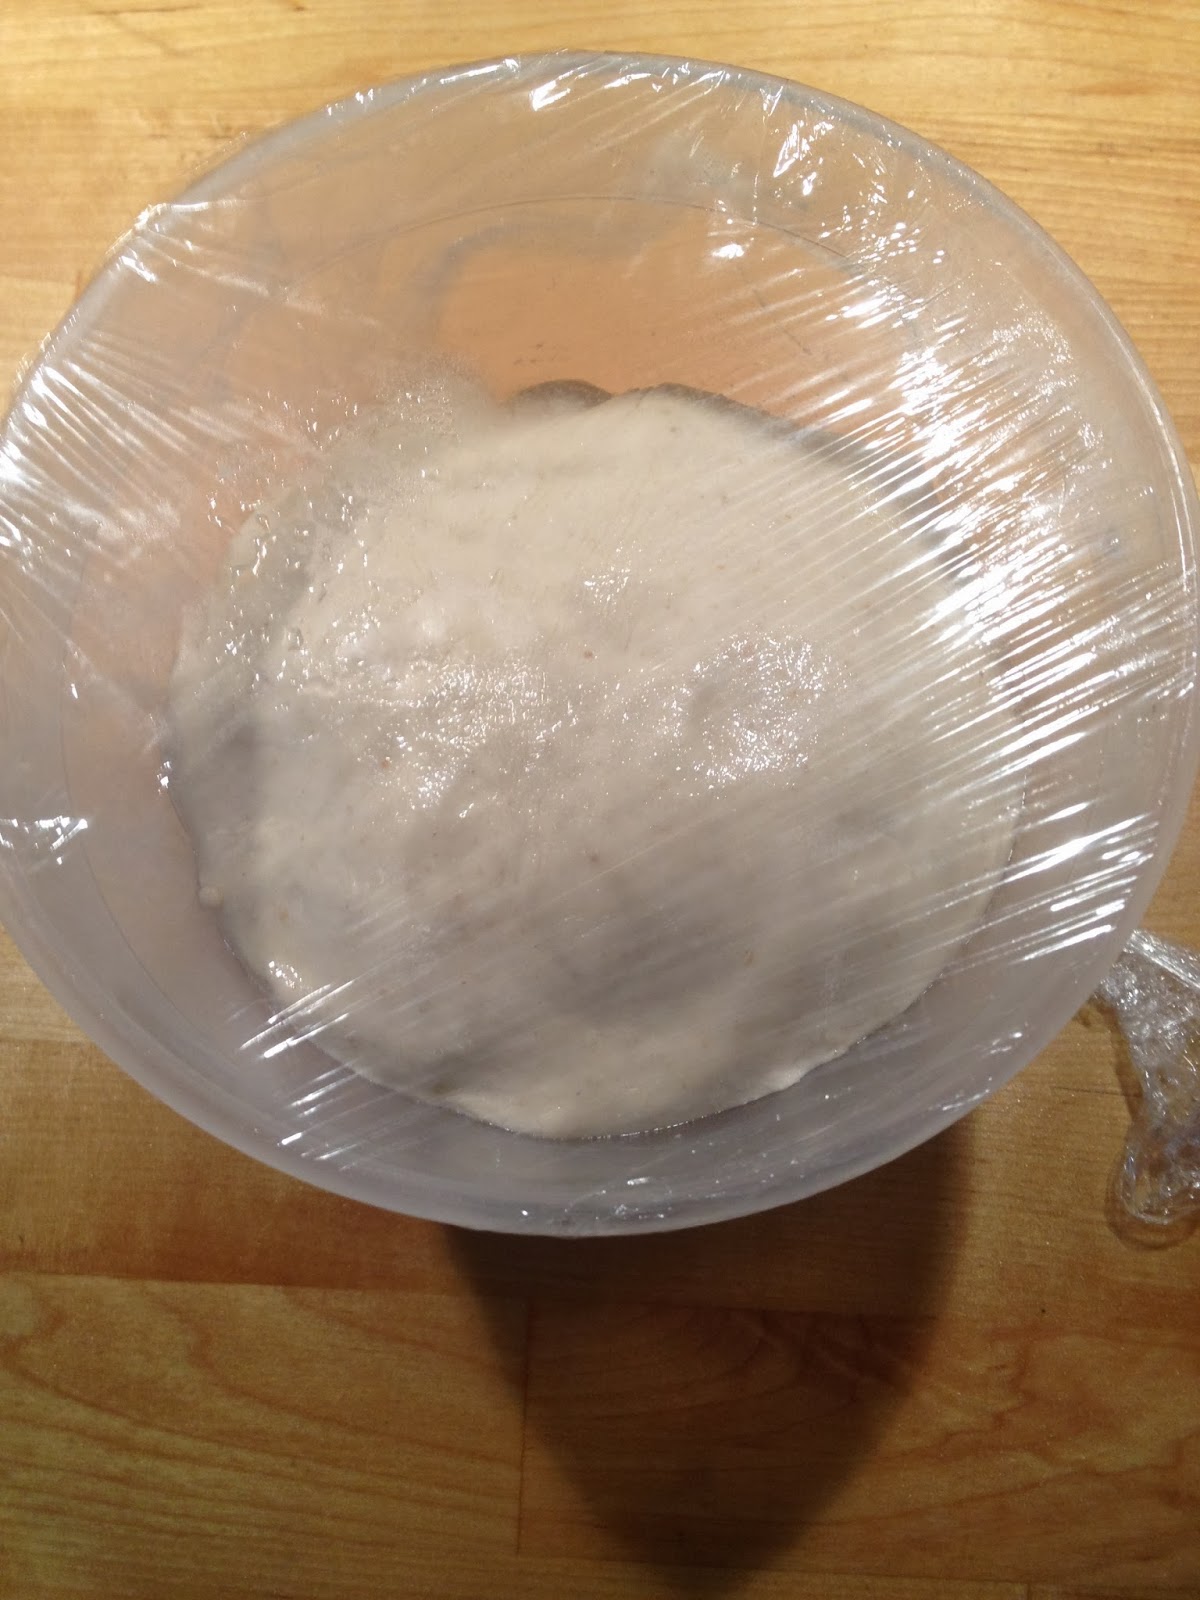
Oiled and covered for night
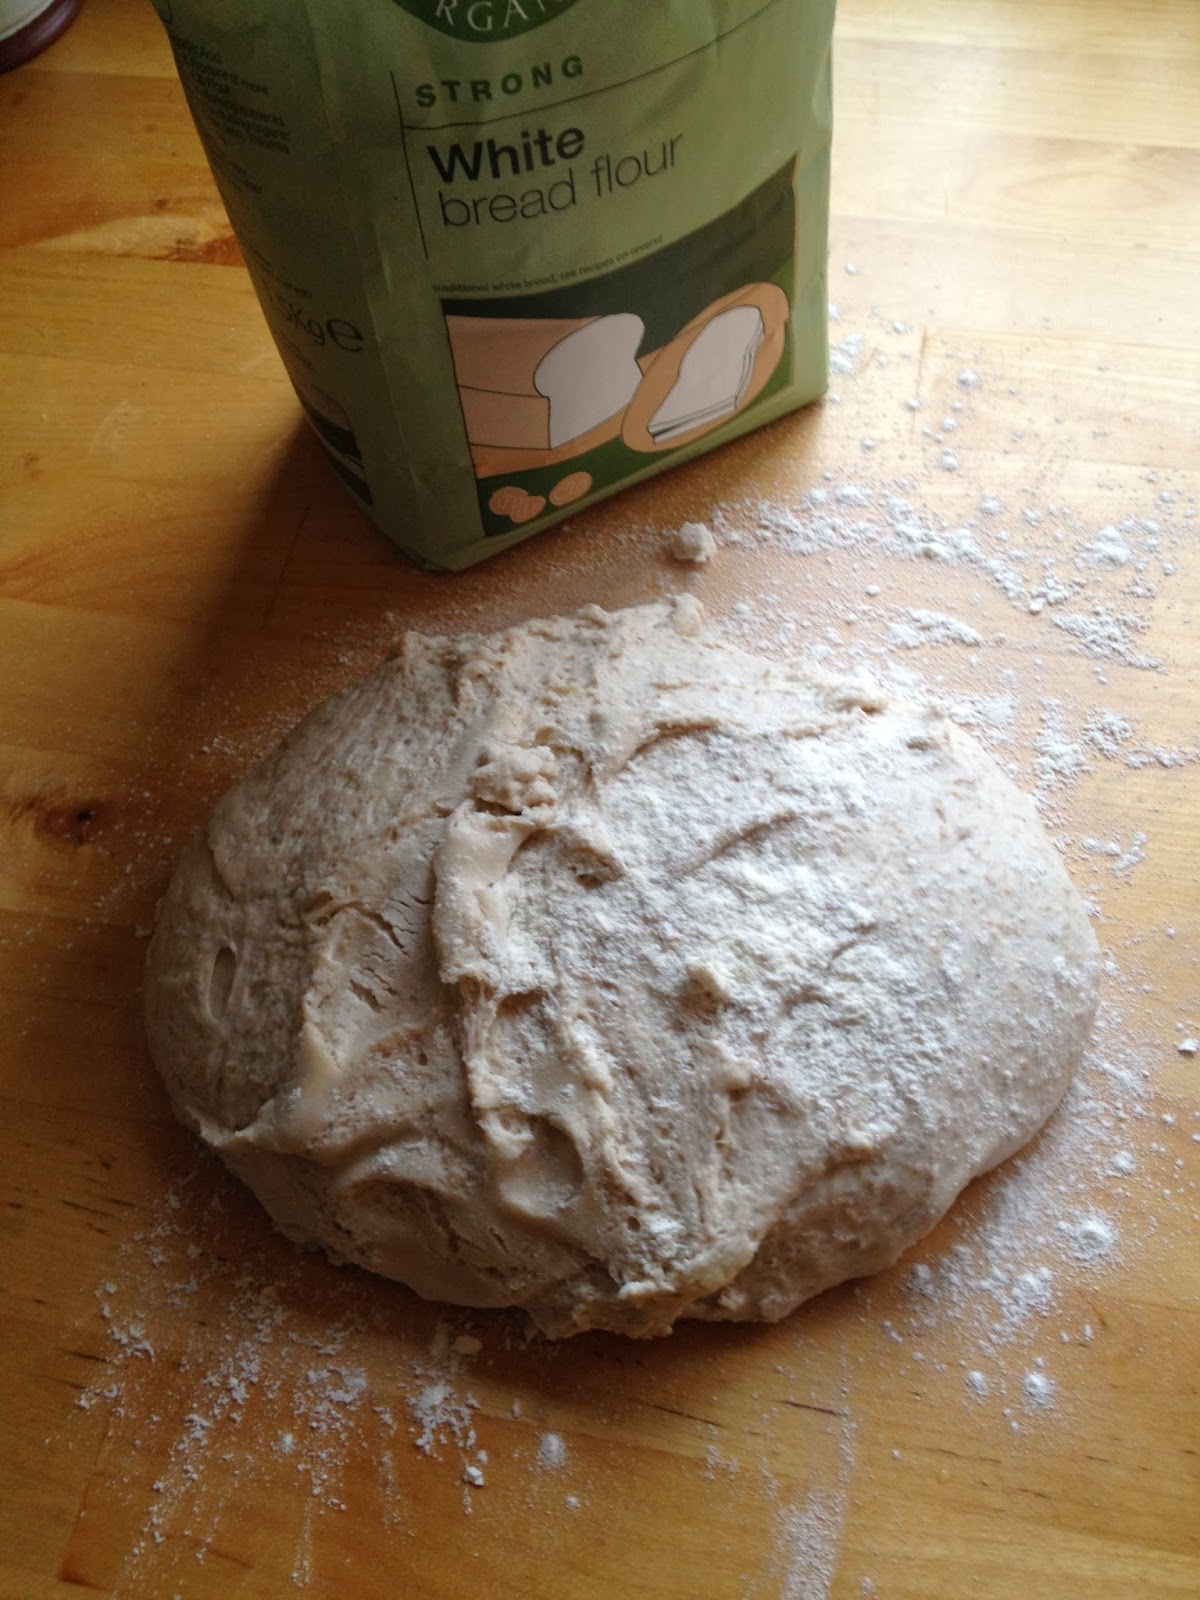
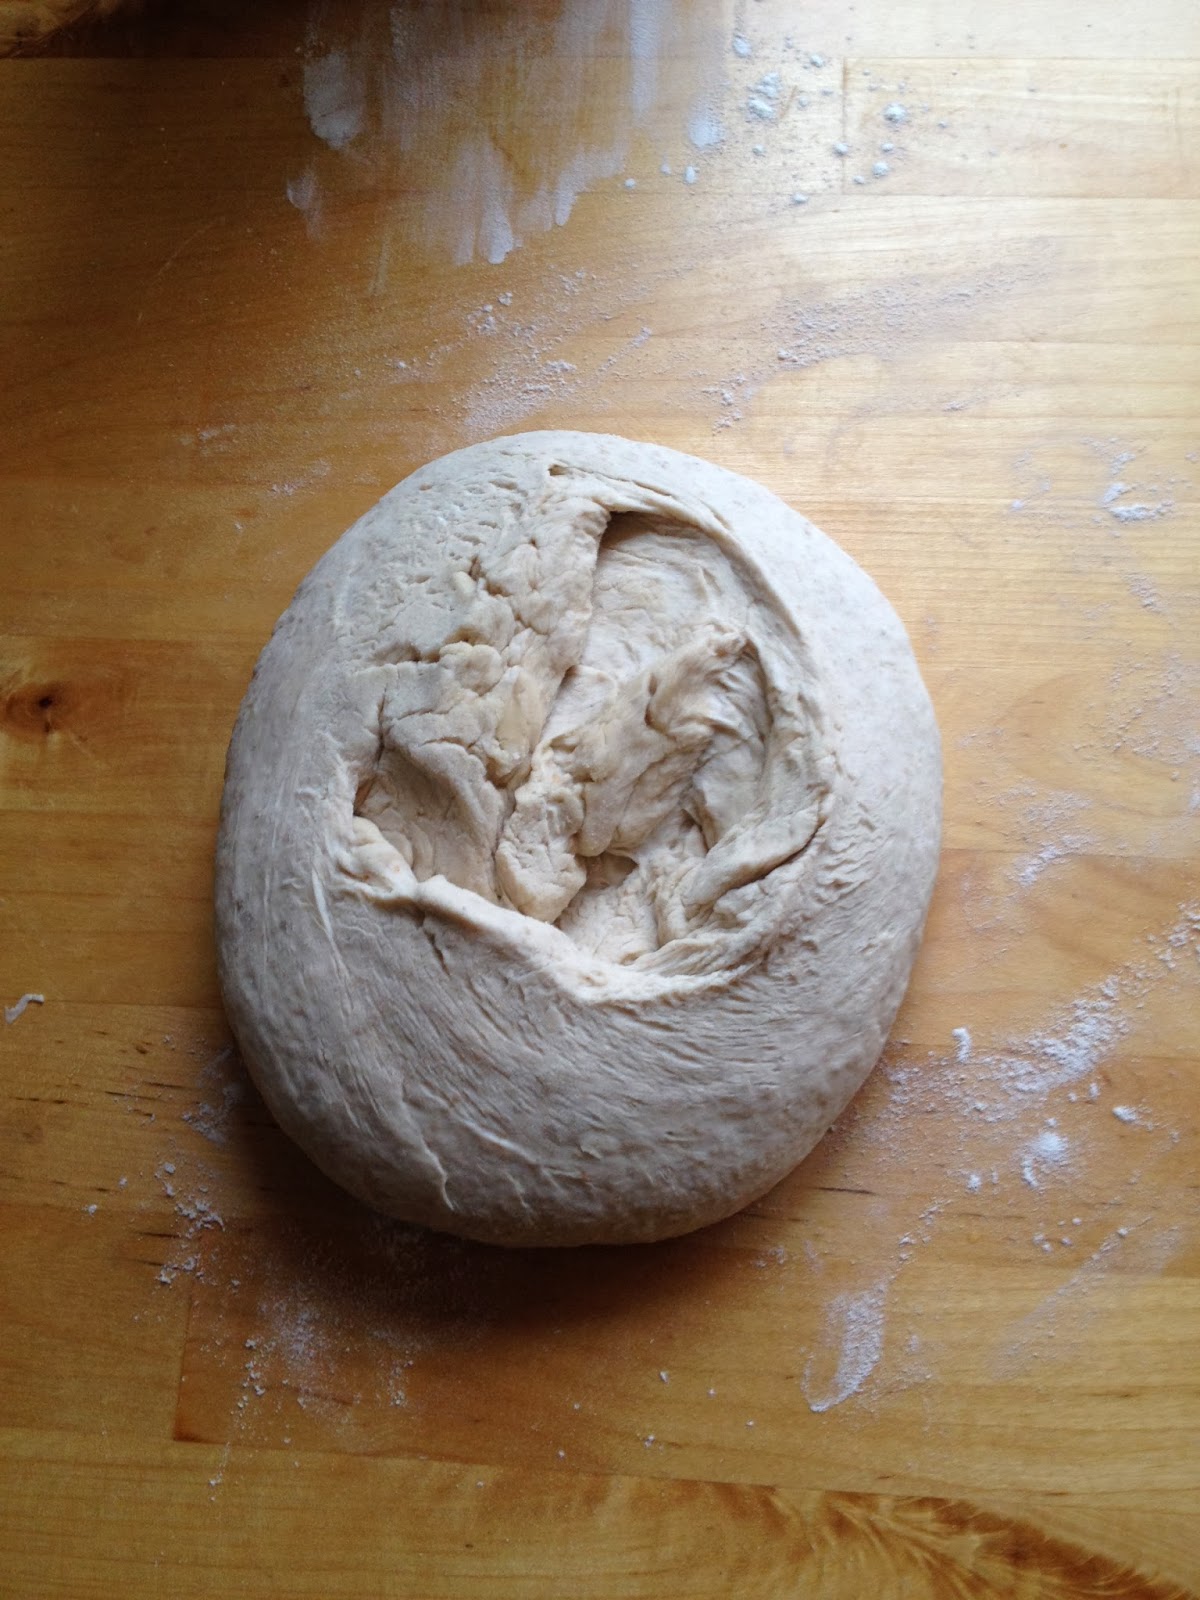
 Next morning turn it out onto a floured surface.

Gather it together gently, turn it over and gradually but gently form it into a round ball. Gently press any big air bubbles out. Place it upside down on a baking tin lined with baking paper.


This is what it looks like underneath.If you invert it as in picture above you get the nice breaks in the crust as in the picture below. Place it on a lined tray and gently with your fore finger rub some water all over it. This stops a crust forming which will prevent it rising. You can sprinkle poppy seeds over it if you like at this stage. Leave to prove for another two hours (3-4 in cold weather).

The dough can be shaped into a round as above or an oblong whichever. I usually cut the oblong shape just before it goes into the oven. See main picture.

To bake put oven at lowest setting with an empty tin on bottom shelf for a few minutes. Place bread on top shelf and pour water into the warmed empty tin. Leave at this temperature for 10-15 minutes.

Turn oven up to 210C fan and add more water to the tin. Bake at this temperature for about 25 minutes. Remove the water and turn your bread around. Bake it for a further 10 minutes at 200C directly on the shelf (remove tin).

Test if baked by tapping the base. If it sounds hollow it's baked. Cool on a wire rack.